The Course
Holes 1 / 10
Holes 1 / 10
Holes 1 / 10

Hole 1 - 360 yards, par 4, Index 9
Hole 10 - 360 yards, par 4, Index 10.
Tricky opening hole for the front 9, with the fairway sloping away to the right.
Shots will naturally tend to go right on landing, but be careful not to go too far right or you could end up over the second fairway facing a long shot to the green. The predominant westerly wind direction on this hole is assisting, so be careful not to go too far, or else you could run out of fairway and end up in the rough!
The green is elevated, with a bank behind.
You need to judge your second shot carefully, as too much will put you on one of the ledges above the green (or even worse, on the moor!). Too little, and the shot will hit the bank and roll back 30 yards to the waiting rough.
Once on the green, be aware that the green always breaks towards the valley.
Holes 2 / 11
Holes 1 / 10
Holes 1 / 10

Hole 2 - 339 yards, par 4, Index 6
Hole 11 - 333 yards, par 4, Index 5
The drive on holes 2 & 11 requires you to cross "Bessie's" gully - the carry is little more than 80 yards, but it's still a daunting prospect, with even the best golfers sometimes failing.
It's out of bounds on the left, but go too far right and you could end up on one of the mounds that divide the first and second fairways, with no option but to hack out onto the fairway.
The second shot is to a green protected by bunkers in front and to the right, with a bank, wall and out of bounds to the left. There is also a plantation of developing trees on the right, just short of the green, which is best avoided.
The green, once you're on it, is fairly large and looks flat, but remember this tip - 'The greens always break towards the valley', and you won't go far wrong.
Holes 3 / 12
Holes 1 / 10
Holes 3 / 12

Hole 3 - 356 yards, par 4, Index 4
Hole 12 - 356 yards, par 4, Index 3.
1st of the 'blind drive' holes - a recurring feature of the course is that, on several holes, you can't see the green from the tee .
The fairway is wide and inviting, with the only obvious trouble being the tree line on the left. However, don't be too complacent, as a drive down the right can end up on one of the many mounds strategically placed to catch an errant drive.
The second shot is also tricky and often requires a club more than it first seems, as the hole is slightly up hill from tee to green.
Try to ensure that you end up below the pin (to the left as you approach the green), as this will make the putt easier. Don't overdo it though, or you'll end up on the wrong side of Merv's mound, and have to chip over it to the green.
The green slopes sharply from right to left as you approach it (more than it appears upon first sight). A putt from above the hole may not stay on the green, particularly in dry conditions.
Holes 4 / 13
Holes 4 / 13
Holes 4 / 13

Hole 4 - 292 yards, par 4, Index 14
Hole 13 - 308 yards, par 4, Index 13.
A short par 4, which is driveable by the big hitters. The drive is again blind, but to a wide fairway that at one time was a football pitch and so is probably the flatest fairway on the course.
Placement of the drive is very important as it is out of bounds both over the boundary wall on the right, and also over the tree line to the left.
A sensible player may elect to take a mid iron off the tee, as any ball reaching the fairway will be in range of the green.
The second shot will often be just a short iron to the green. Judgement is all important here, as the green is slightly downhill and slopes away from you. Any shot slightly overhit is likely to run through the green, over the back, and end up in the rough.
Once on the green the putt is fairly straightforward, with the green being largely flat.
Holes 5 / 14
Holes 4 / 13
Holes 4 / 13

Hole 5 - 394 yards, par 4, Index 2
Hole 14 - 394 yards, par 4, Index 1.
The fifth hole is the longest on the course at just under 400 yards - all of which is uphill. Again, the tee shot is blind, but to a wide fairway.
Try to place your drive on the fairway or risk hitting one of the mounds between fairways to the left, or the base of the 6th green to the right.
Unless you're one of the longer hitters, your second shot will also be blind to a green that slopes from right to left. Approach shots hit to the right will feed down to the green, so long as you get them far enough - short and you risk ending up in the rough, with a tough shot to a green sloping away from you.
Again, the putt will break towards the valley.
Holes 6 / 15
Holes 4 / 13
Holes 6 / 15

Hole 6 - 272 yards, par 4, Index 17
Hole 15 - 272 yards par 4, Index 18.
The sixth hole is a right to left dogleg, back towards the Clubhouse.
Relatively short at 272 yards, it often tempts the bigger hitters to try to drive the green. However, to do so, you either need to play a draw around the corner or go out across the moor - both potentially risky strategies.
If you elect to play safe you will find youself with a shot up to an elevated green, which is probably the largest on the course. Banks at the back and side can assist you in ending up on the green.
Over the years, this green has developed many undulations and subtle borrows, and if you end up with a long putt you will do well to be down in 2.
Holes 7 / 16

Hole 7 - 112 yards, par 3, Index 16
Hole 16 - 133 yards, par 3, Index 15.
Start of the 'King of the Mountain' trio of holes.
The first of two par 3's on the course, hole 7 is the shortest hole on the course, but it's all uphill, so club selection is crucial. Hole 16 is played from the back tee, and is some 20 yards longer.
The tee shot is all up hill, to a green set into the side of the hill.
Miss the green on the left and you could end up on a ledge above the green or, even worse, out of bounds over the boundary wall. Miss on the right and the ball may roll down the hill and into the gorse, which divides this hole from the 9th fairway.
Once on the green remember the tip about which way putts break, and you won't go far wrong!
Holes 8 / 17

Hole 8 - 164 yards, par 3, Index 8
Hole 1 17 - 165 yards par 3, Index 7.
This hole is right at the very top of the course and is the most exposed to the weather conditions.
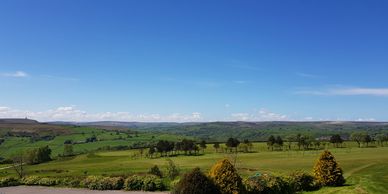
The views over the surrounding countryside are spectacular, but don't let them distract you from the task in hand. To reach this green, you need to carry the ball to a narrow landing area.
There are no prizes for being too far right or left, because you will likely struggle to save par.
Dependent on the prevailing wind conditions, this hole can requires as little as an 9 iron, or as much as a driver. Hole 17 is played from the lower tee, and usually requires a club more than for hole8!
Once on the green the putt is fairly straightforward, so relax and enjoy the views.
Holes 9 / 18
Holes 9 / 18

Hole 9 - 316 yards, par 4, Index 11
Hole 18 - 316 yards, par 4, Index 12.
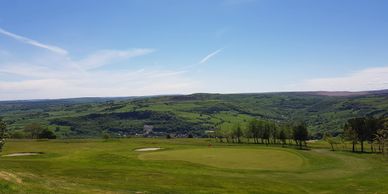
Take a moment to appreciate the fabulous views from the tee. Much of the course is visible from this vantage point, and you can see the green just over 300 yards away, and around 100ft below you.
The fairway slopes sharply from right to left as you look and, even if you hit it, you will be lucky to keep the ball on it.
The carry from the tee to the start of the fairway is around 180 yards, so it takes a good hit to get there. Many golfers end up in the 'big hollow' (especially when the wind is against), with a blind second to the green.
For your second shot, try to avoid the bunker to the front left of the green, as it is the deepest on the course. The green is protected by banks to left and right, with a plantation of trees behind.
Once on the green, remember the earlier advice and you may end up with a birdie to finish the 9.
Then, depending on if you're playing 9 or 18, its off to the 10th tee, to do it all again - or head for the 19th for a well earned drink.